Make a Personalised Photo Memory Box for a New Baby
October 03, 2026 - Handmade Gifts


October 03, 2026 - Handmade Gifts
September 30, 2026 - Craft Ideas
September 28, 2026 - Home Decor
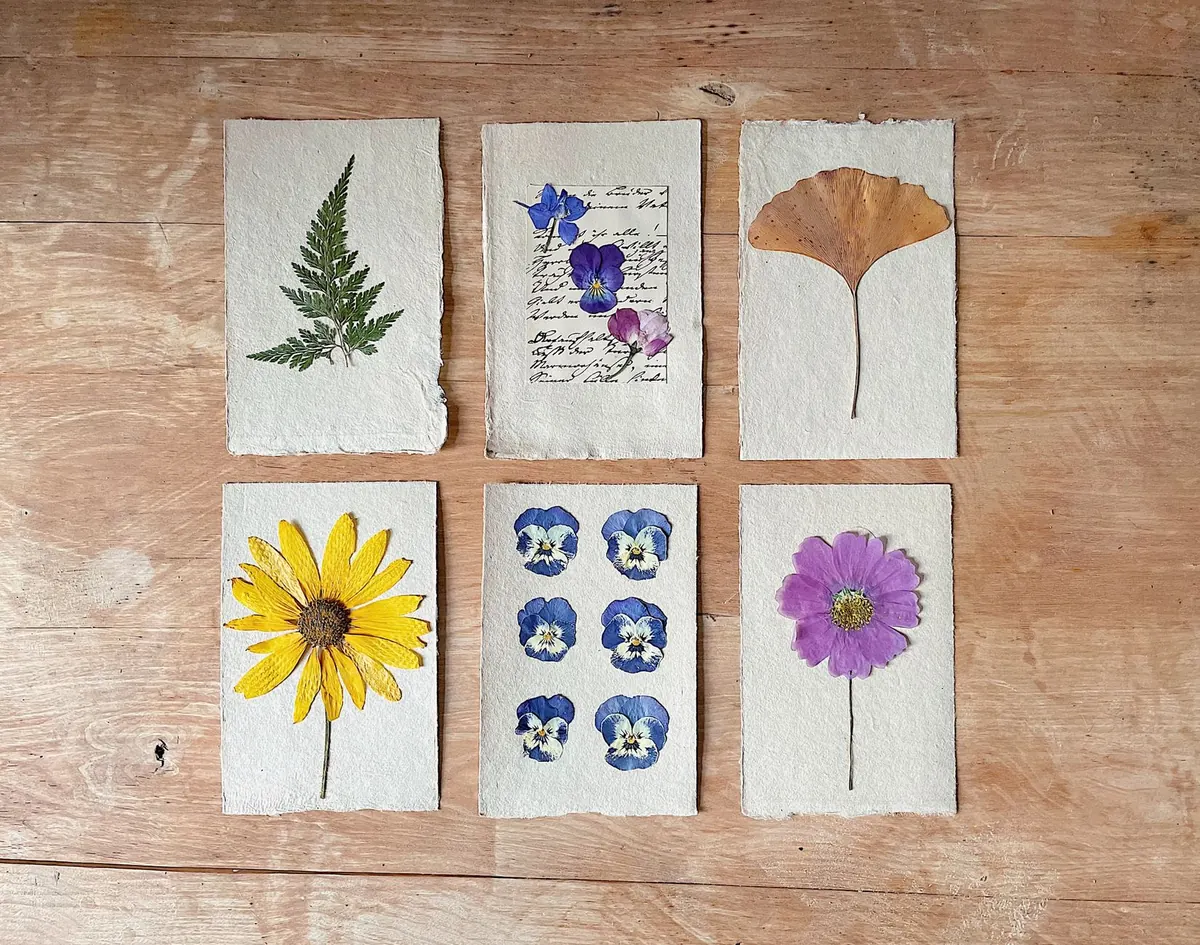
There is a particular pleasure in opening a heavy book a fortnight later and finding the pansy you picked on a warm Tuesday, flat as a stamp and still faintly blue. Pressing flowers is slow, cheap and forgiving, and the results make wall art that looks far more expensive than it was. You almost certainly own everything you need already, and your garden is already growing the raw material.
Half the success of a pressed flower frame is decided before you open a book. Thin, flat flowers press beautifully; thick, fleshy ones turn to mush, go brown or grow mould. Pick on a dry day, mid-morning, once the dew has dried but before the sun has started to wilt everything. A shallow tray beats a bag — bruised petals show up later.
Reliable candidates include:
Roses need their petals separated and pressed individually. Succulents, sunflowers and anything with a thick, watery stem will disappoint you. Stick to your own garden or a friend's — never pick from the wild, where many flowers are protected and the seed heads feed birds and insects through the winter.
This takes two to four weeks and gives the best results.
A microwave works well for thin flowers. Sandwich them between blotting paper and two ceramic tiles, then microwave on low power in 30-second bursts, letting everything cool between each one. Check constantly, as they scorch quickly. Keep those tiles and sheets for crafting only, well away from food preparation.
An iron is quicker still for petals. Use the lowest heat setting with the steam turned off, place the flowers between two sheets of blotting paper, and press for 10 to 15 seconds at a time, lifting the iron between passes. Thin blooms dry in minutes; anything thicker is better left in the book.
Use acid-free card and an acid-free mount. Cheap coloured card contains lignin that yellows within a year or two, and it will take your flowers with it. If you want colour, choose a coloured mount rather than coloured card behind the blooms.
Work on a sheet of plain paper so you can slide the arrangement around without touching it. Tweezers are essential here — the oils on your fingers damage dried petals. Try a few layouts before you commit. A small cluster placed off-centre often looks better than a symmetrical one, and a single specimen with its name, the date and the place written beneath it in fine pen makes a lovely record of one particular summer. Leave a generous border; flowers crammed against the mount look anxious.
To fix everything down, use the smallest possible dab of PVA on the thickest part of the stem, or archival glue dots, or photo corners tucked behind petals. Too much glue bleeds through and leaves a shiny stain. Less is always more: six flowers arranged thoughtfully will beat twenty crammed together.
Choose a frame with a deep rebate, or a box frame, so the glass never presses down on the flowers. A cut mount does two jobs: it holds the card in place and creates the air gap that keeps petals crisp.
UV-filtering glass or acrylic slows fading noticeably and is worth the extra if the frame will hang in daylight; ordinary glass is fine for a dim hallway. Seal the back with gummed paper tape once the frame is assembled, which keeps out dust, insects and damp. Avoid external-facing walls and anywhere that suffers condensation.
Brown patches mean trapped moisture — usually paper that was not changed often enough, or glue that bled. Curling petals mean the flowers were moved before they were completely dry. Mould is nearly always a sign of a damp room rather than a mistake in pressing, so move the frame somewhere drier and try again.
Fading is not a fault; it is what pressed flowers do. Reds and pinks lose their colour first, while blues, purples and yellows hold far longer, which is worth remembering when you plan a colour scheme.
Keep the frame out of direct sunlight, away from radiators and well clear of kitchens and bathrooms, where steam will undo your good work. Dust the glass with a dry, soft brush and leave the frame sealed. Write the date and the garden on the back before you hang it, and if it is a gift, tuck a small note inside listing what is pressed there. Then start a second one — once a flower press is going, it costs nothing to keep it topped up through the summer.
Photo: Merve Bayar / Pexels
Turn a plain wooden box into a keepsake for baby's first year, using paint, decoupage and labels to store tiny...
A friendly beginner's guide to crochet using UK terms, from choosing yarn and hooks to making your first granny...
October 03, 2026 - Handmade Gifts
September 30, 2026 - Craft Ideas
Copyright © 2026 Ideal Craft. All Right Reserved.